In Getting Sassy with WordPress Part 1, we discussed how to manage using Compass and SASS for your WordPress project. Now we can take our use of Compass one step further and start using image sprites.
Image sprites have been used in CSS for quite some time, lending efficiency to both our stylesheets and downloads. With Compass, you can take the labor out of creating images and let Compass do the work for you. Compass can take .png files and create a sprite file. You then use a mixin to reference which image you want to use.
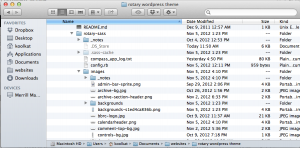
In part 1, we discussed how to use the Compass generated stylsheets in WordPress. Images should also reside in your project directory. So, if your project is directory is “rotary-sass”, this is where your images directory should be located. Note that this is different from the typical WordPress implementation where the image directory appears immediately under the theme or stylesheet directory.
Once your image directory is in the correct location for Compass, create sub-directory for your .png images that will be “sprited” under the images directory. I called my directory, backgrounds. Here is what this directory structure looks like in my Compass project:

The next step is to copy all of your .png images to be sprited int to the backgrounds directory. In your SASS file, include the following:
@import "backgrounds/*.png";
Note: I put this import statement in my _bass.scss file.
Then, wherever you need one the background images, use the following mixin…
@include backgrounds-sprite("filename");
where backgrounds is your directory name and filename is the actual name of your original .png file without the extension. Compass will create a new sprite file in your images directory. It will have a name similar to:
backgrounds-sfc45308739.png
where backgrounds will be replaced by whatever name you used for your sprite directory. This file is referenced in your generated CSS file so be sure to upload it to your server along with the CSS file.


-0 Comments